Chapter 12 · Les Fonds
Frico Laminé (Baked Cheese Tiles & Vessels)
A structural, multi-variant foundation for baked, edible “stained glass” tiles and molded vessels built from high-protein cheese matrices and moisture-controlled inclusions.
Yield: 12–18 tiles/vessels | Prep: 45 min | Cook: 20 min | Total: 1 hr 5 min
Headnote
This folio is the “Construction Site” of the larder — we are building structural components rather than simple garnishes. By manipulating the cheese matrix, we control the tensile strength, color, and snap of the frico, producing everything from a delicate herb-laminated tile to a rigid, high-walled vessel. Baking — rather than pan-cooking — gives even browning across a full sheet, a longer plastic-phase window for shaping, and hands-free batch control.
Teaching Idea: Thermal Plasticity. Between 150°F/65°C and 110°F/43°C, the frico is in its “plastic” phase — drapeable, foldable, geometrically cuttable with clean edges. Once it drops below 100°F/38°C, it enters the “glass” phase; any attempt to reshape will shatter it. Oven-baked fricos hold the plastic phase roughly 30–45 seconds on the counter (versus 5–10 seconds from a stovetop pan) because the Silpat and cheese retain heat far longer than a bare pan releases it.
Ingredients
The Base Matrix (Variant 1: The Control)
- 200 g (2 cups) Parmigiano-Reggiano, microplaned
- 50 g (½ cup) Irish Dubliner, microplaned
Variant Modifier Table
Modify only the base matrix to adjust color, flavor, and rigidity.
| Variant | Base Matrix | Secondary Cheese | Profile | Outcome |
|---|---|---|---|---|
| A. The Standard | 200 g Parmigiano | — | Pure Umami | Maximum rigidity; classic lace pattern. |
| B. The Dubliner | 150 g Parmigiano | 100 g Dubliner | Sharp / Nutty | Golden amber color; savory finish. |
| C. The Modernist | 150 g Parmigiano | 100 g Mimolette | Earthy / Vivid | Vibrant orange; ultra-hard snap. |
| D. The Ivory | 150 g Parmigiano | 100 g Manchego | Creamy / Tangy | Off-white; smoother “wafer” finish. |
The Laminate Modifiers (Inclusions)
All inclusions must be processed via Folio 01-20 (Blanch & Press) before use.
| Class | Examples | Prep Style |
|---|---|---|
| Soft Herbs | Basil, Cilantro, Parsley | Whole leaves, pressed flat. |
| Brassicas | Purple Cabbage, Kale | Fine julienne “needles” or aspic-cut shapes. |
| Root Veg | Carrots, Parsnips, Radish | Paper-thin mandoline or shaped with tiny cutters. |
| Alliums | Chives, Scallion whites | 2-inch batons or fine bias slices. |
Mise en Place (Action Checklist)
- Stabilize Inclusions: Complete the 01-20 Hydro-Thermal Stabilization process for all inclusions in advance — they must be bone-dry before you begin.
- Matrix Prep: Microplane all cheeses into a fluffy pile. Do not use a standard box grater; we need a high surface-area “snow” for an even, lacy melt.
- Oven Setup: Preheat to 375°F/190°C on Standard Bake, rack in center position. Line a full sheet pan with a Silpat or parchment.
- Shape Station: Arrange molds (rocks glasses, shot glasses, or cannoli forms) and metal ring/cookie cutters on a cool surface near the oven.
- Tool Setup: Thin offset spatula, 3-inch ring mold (as stencil), timer.
Method
Phase 1: Form the Discs.
- Place the 3-inch ring mold on the prepared Silpat as a stencil.
- Sprinkle a thin, uniform layer of your cheese mixture (approximately 1 tbsp, ~6 g) inside the ring — thin enough that you can just see the Silpat through the cheese.
- Lift the ring straight up. Repeat across the sheet, leaving at least 1 inch between discs. A full sheet holds 9–12 discs.
Phase 2: First Bake (The Webbing).
- Bake at 375°F/190°C for 2–3 minutes. The cheese will melt and begin “webbing” — lace-like holes opening across the surface, edges just starting to bubble, no color yet.
- Pull the pan and move quickly into Phase 3. The sheet will stay hot enough to keep the cheese in working condition for roughly 60 seconds.
Phase 3: Lamination (The Sandwich).
- Lay your stabilized Laminate (herb leaf, carrot shape, cabbage julienne) flat onto each partially-melted disc, pressing gently so it contacts the cheese.
- Dust a second, very light layer of matrix (~1 tsp) over each inclusion.
- Why: Adding the laminate at the webbing stage locks it into the matrix before the cheese vitrifies. Added earlier, the inclusion steams and deposits moisture into the cheese (weakening the tile); added after the final render, it sits on top as a garnish rather than a structural element.
Phase 4: Second Bake (The Render).
- Return the pan to the oven. Bake a further 4–5 minutes, until the cheese is uniformly golden-amber and the bubbling has slowed to a lazy, deliberate rate.
- Sensory Cue: A thin offset spatula should slide cleanly under a disc, lifting the entire tile as one rigid, lace-like sheet without drooping or tearing.
Phase 5: Shaping (The 30–45 Second Window).
Work one disc at a time. Keep the remaining discs on the sheet pan — the hot Silpat extends your plastic phase. If a disc has cooled below working temperature, return the full sheet to the oven for 30 seconds to re-plasticize.
- Option 1: The Flat Tile (Geometric Cut): Lift the disc to a cool surface with an offset spatula. Within 5 seconds, punch with a metal ring or cookie cutter. Remove scraps while still warm.
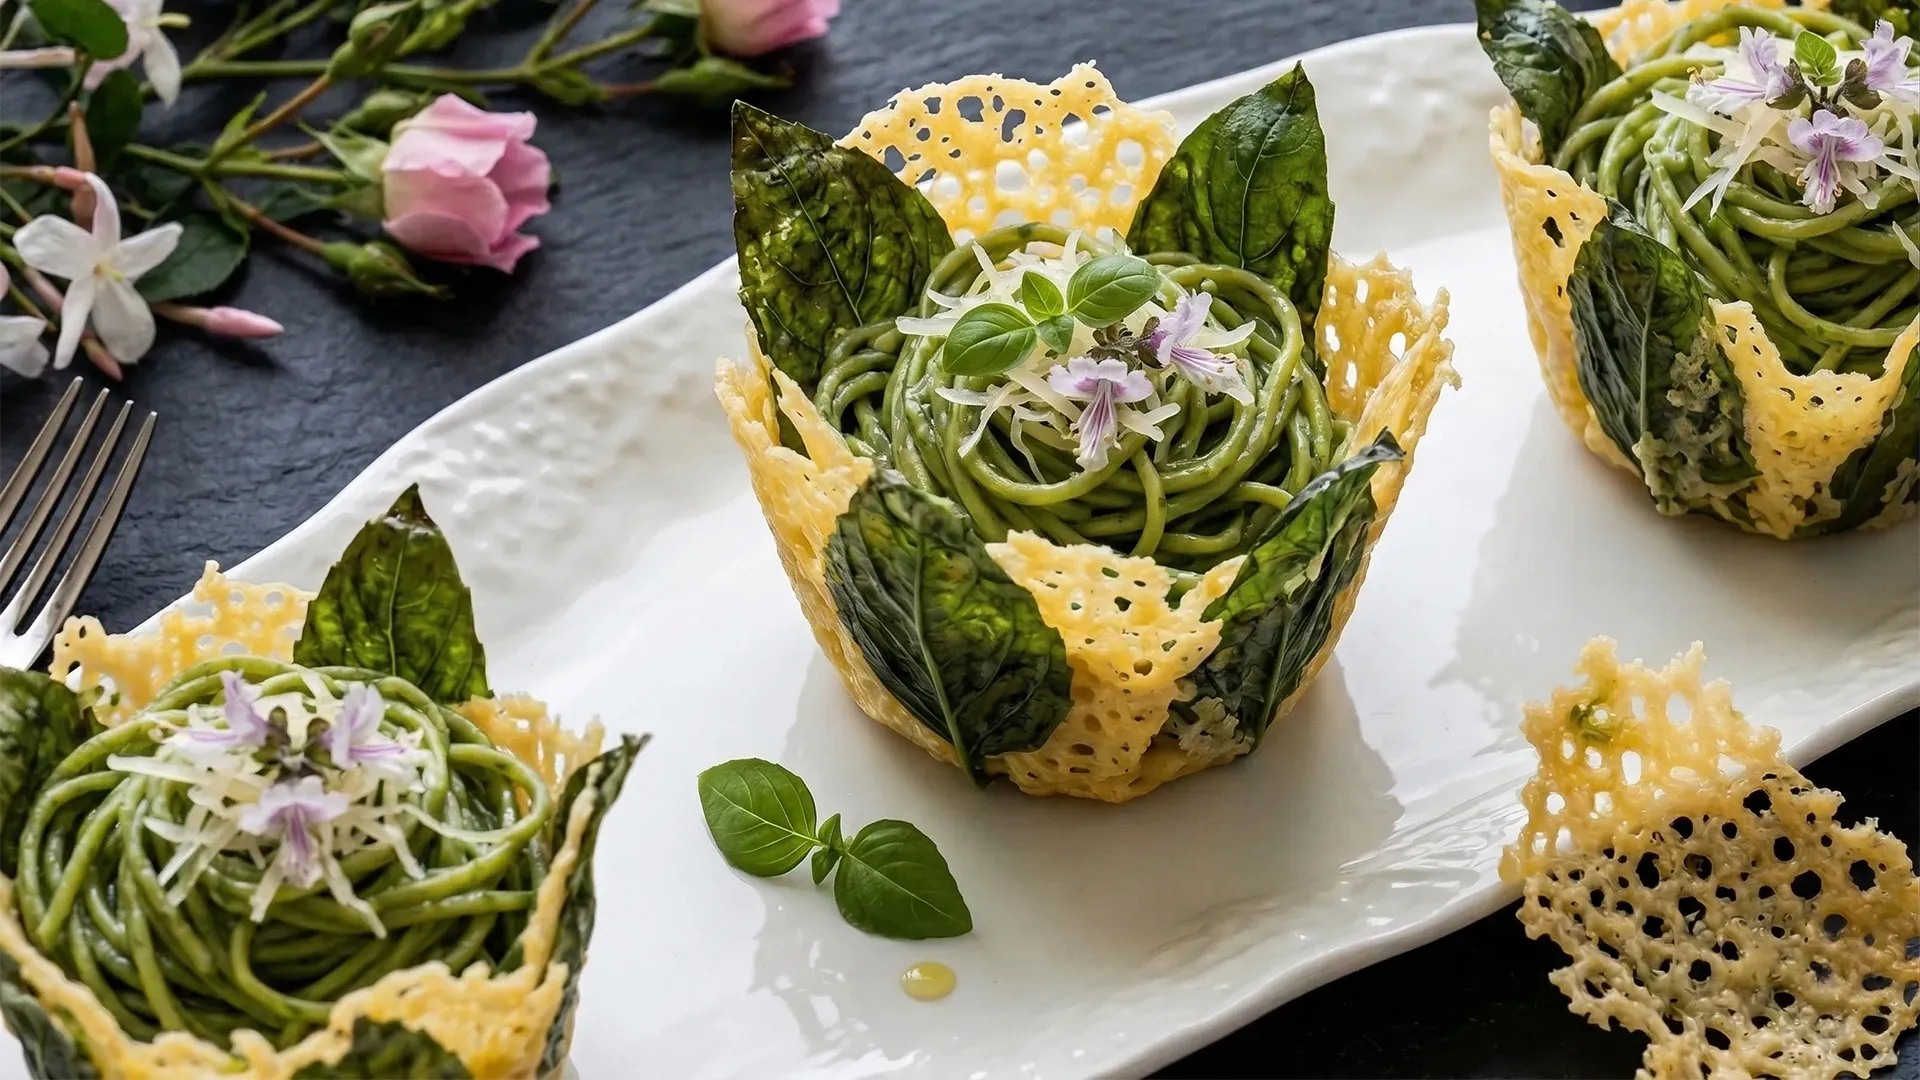
- Option 2: The Molded Vessel (Vase/Cup): Drape the hot disc over an inverted rocks glass (large vessel) or shot glass (mini). Press a second glass gently over the top to set the pleats into a uniform cup.
- Option 3: The Structural Tube: Wrap the disc around a cannoli mold or clean food-grade pipe; press the seam lightly to close.
Chef’s Notes
Oven Format Notes (Samsung)
- Standard Bake (primary method): 375°F/190°C, 2–3 min webbing + 4–5 min render. Most forgiving method; best for learning the plastic-phase windows and for large-batch production.
- Convection Bake: Drop to 350°F/175°C and shave ~1 min from each phase (1.5–2 min webbing + 3–4 min render). Forced air browns faster and more evenly across the sheet, but edges color more aggressively — rotate the pan 180° halfway through the render if the oven runs hot on one side. Best choice for a full sheet at once.
- Air Fryer Mode: 350°F/175°C, 90 sec webbing + 2–3 min render. Cut parchment to fit the basket and work in small batches of 2–3 discs. Rapid convection cooks fast and can over-brown edges; pull the moment active bubbling slows. Best for à la minute service when you need three tiles for one plate.
Technique Notes
- Carrot Geometric Shapes: To mimic the look of the basil in reference images, punch small aspic shapes from mandolined carrot slices before blanching.
- Flatness Protocol: For perfectly flat tiles, place a second Silpat and a weighted sheet pan on top of the fricos as they cool through the glass phase.
- Flavor Stacking: Mimolette (Variant C) pairs exceptionally well with purple cabbage for high-contrast visual and earthy flavor.
- Scrap Utility: Do not discard geometric off-cuts — they provide a “broken glass” garnish with concentrated umami.
Glossary
- Hydro-Thermal Stabilization: The combined use of heat and pressure to prep inclusions for fat-based cooking.
- Thermal Plasticity: The state in which cheese fat is pliable before crystallization.
- Lamination: Layering material (cheese–inclusion–cheese) to create a reinforced composite structure.
- Matrix: The structural medium (cheese) that holds the laminates.
- Silpat: A fiberglass-reinforced silicone baking mat (genericized brand name) used to line sheet pans. Non-stick, reusable, heat-stable to ~480°F/249°C — preferred over parchment for baked fricos because clean release protects fragile lace structure and the mat retains counter heat long enough to extend the plastic-phase shaping window.
- Webbing: The initial melt stage at which the cheese forms a lace-like, partially-set network — the correct window in which to introduce the laminate.